• Skip to primary navigation
  • Skip to main content
  • Skip to primary sidebar

Quilt As You Go, Simply Done

Simply Done

  • Home
  • Crazy Shortcut Quilts
  • Finish Any Quilt
  • Tee Shirt Quilts – Quilt As You Go
  • Modern Quilts
  • Crazy Shortcake
  • The Authors
  • Comfort
  • Marguerita’s Blog
  • Finished Quilts!
  • Our Quilt Videos
  • Favorite Tools
  • Newsletter

Meet ...

Wenonah’s T-Shirt Quilt

June 8, 2021 by Marguerita

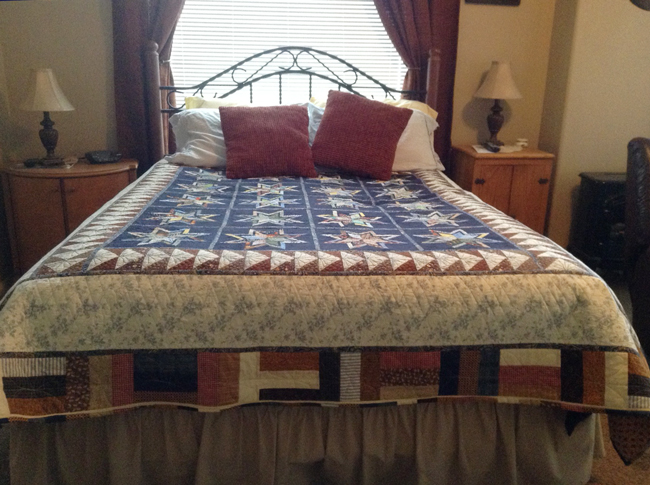
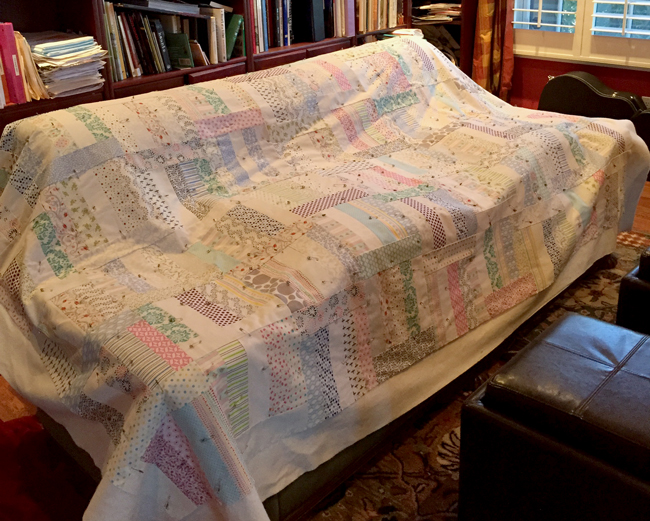
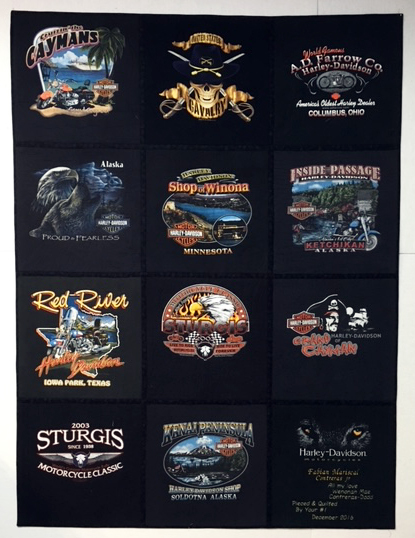
Wenonah’s dad loves his Harleys! He’d collected T-Shirts from many places and Wenonah put them together into this quilt, which he uses and loves. She also helped me tremendously when I was writing my T-Shirt Quilts book, by arranging a quilting retreat with friends and they all tested stabilizers!

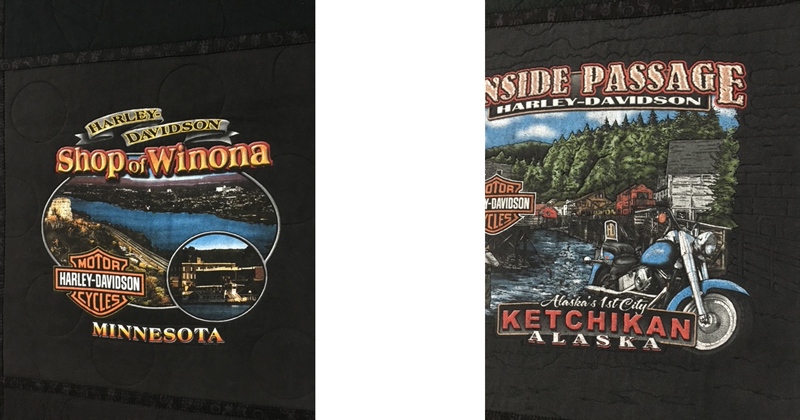
Below are a couple of close-ups of the T-shirts. Wenonah lived in Alaska at the time the book was written but has since moved to Ohio to be closer to her parents.

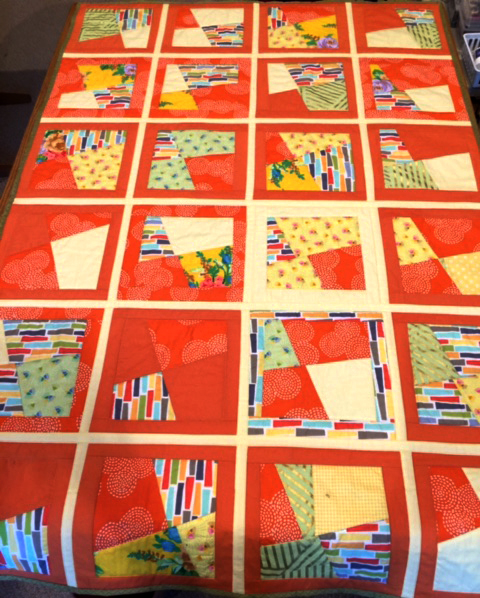
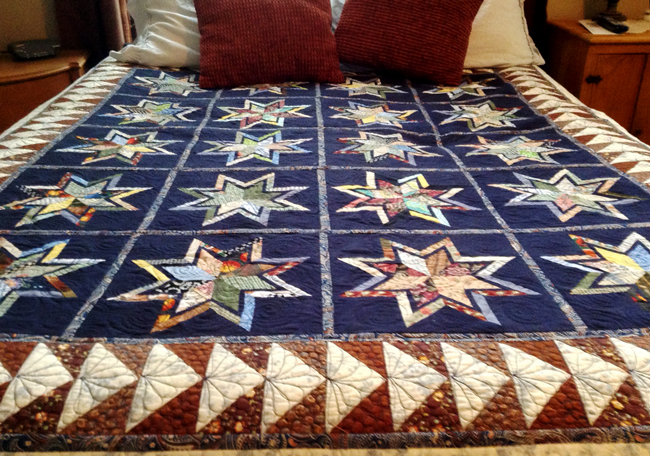
Wenonah was one of the first quilters to share a photo of her “Crazy Shortcut Quilt” when we first released that book (2007) and I was astonished to find out that we both lived in Alaska. Over the years we’ve met up, gone to retreats (she’s the organizer), swapped photos and emails and had a lot of quilting fun. She has the best friends and I am grateful to be counted among them. ~Marguerita

Filed Under: Meet ..., Quilt As You Go, Quilts, T-Shirt Quilts

Brian’s Pfancy Sewing & Quilting Table

May 28, 2021 by Marguerita

I have to say, my jaw dropped at Brian’s adaptations to my “cheap (foam) custom table”. Here’s his story and it’s a great read! He’s a sewist, innovator, and great writer!

Check out his storage and be sure to read his story!

Marguerita,

Brian’s Pfancy Pfaff Pfewing Mapfhine Table

I’m not really a quilter, but, when I bought a Pfaff Creative 3.0 and I wanted a better table than the coffee table (which I knew was not a good ergo work table and hated with a passion) that I had been using for my Pfaff 1222, so I Googled and found your table.  I won’t say that I ran with it, I ran, swan, flew and did a triathlon with it.  I liked the table, the idea, the ergo and the materials, but couldn’t stand the idea of all that potential storage space going to waste and needed to adapt for the embroidery mechanism, so here’s my version of your table, to fit a Pfaff Creative 3.0, with storage and adaptable for the embroidery section:

It’s made of half-inch (actually 5/8”) and one inch foam with some 1/4” birch plywood.  I used the vinyl for all lid hinges.  Some of the sections are held on the table by Command Strips that are like Velcro—I can fold the table with some of the sections still on, good for travel.  And before you ask (he said innocently), no, I didn’t intend to have the panther on the lids, I can’t imagine (grins) why you’d ask.  Actually, the panther insisted that as long as he was going to be involved, he wanted to be able to watch and make sure I was doing things correctly.  On most sections, the vinyl can be flipped up and notes & stuff placed under it. 

I was prepared to drill additional holes in the legs for the height adjustment, but didn’t need to—according to what I learned in the aerospace industry, as little as an inch can make a huge difference in ergo comfort

The area to the left of the machine is thread and general storage, with 36 pins to hold spools and bobbins (I found some nice bobbin holders that fit on spools).  It is also shadow-boxed for the things that are not thread.  This section (and the section behind it) slide to the left when using the embroidery mech.  I had to shape the lid of this section to match the curve of the machine.

The area in front of the machine I didn’t do anything with as it will be supporting (occasionally) my arms and will take the brunt of things sliding over the table.  It had to have a portion under the normal machine table excavated for the machine’s storage compartment lid.

The area to the right and in front of the machine has to have access to the feed-dog control knob, so part of it is removeable and under it is a space for two tape measures and thread scissors.  With magnets on the end to hold pins and magnets for a pivot so the lid can be removed.  This section sets the front position of the machine.

To the right of the machine is a block that sets the position of the machine.

The area behind and to the right of the machine is a space where I put the normal machine table when I use the embroidery mechanism.  This also sets the position of the machine.

The area behind where the embroidery mechanism goes was hardest, it must have clearance for the mechanism, which is a different height (and under-side) and width than the regular machine table and have the height & space for the machine table, too.  The two sections have some general storage.

All the sections have vinyl tops which can be lifted to place notes or such and still be protected.

Many re-dos and changes of design, but, of course, I didn’t make any mistakes— I meant to do that!.  I learned that from my cat. ;^)

Thank you for inspiring me.

Brian S

Pure genius! Who doesn’t need more storage?
He created a perfect fit – I LOVE it!
See the tips of the scissors on the right? Check out the next pic…
Easy, safe storage yet right there to use when needed.
He even used my favorite adjustable-height table!
I loved this so much that I made a video about it!

Filed Under: comfort, Ergonomics, Meet ..., quilting table

Joanne D & Me

October 2, 2016 by Marguerita

Joanne D and I have been emailing for a while, and I have to tell you that I— number one, admire everyone who can ask for help and —number two, love anyone who can laugh at their own mistakes. These are two qualities I value deeply, so she and I are hitting it off quite well.

When she signed up for my newsletter she mentioned that she needed help understanding the block joining process. I know that, no matter how many times I write it (in books) or how many times I teach it in classes, not everyone is going to say “aha!” the minute they read it. It’s confusing and what’s worse, it’s frustrating when your’re confused. I felt her pain.

I sent all my best tips and she took a deep breath – and she got it!

Then she sent me her pics and I notes and I just had to smile. She told me about her “oopsie” and I told her about mine (and I have plenty).

Here’s Joanne’s quilt, and I thank her deeply for sharing it and her quilting adventure with me. You won’t see any mistakes on the top, her tiny oops is on the back. I wish I could say the same for my quilts 🙂

Joanne DeS's Quilt

Joanne DeS’s Quilt

Filed Under: Finish Any Quilt, Meet ..., Quilt As You Go

Bonnie’s Sawtooth Star Quilt with Quilted Borders

September 25, 2016 by Marguerita

I recently received the nicest note from Bonnie about a quilt she adapted to quilt-as-you-go, using methods that worked best for her. That’s my very favorite kind of story! Thank you Bonnie for sharing your quilt and your tips!

Dear Marguerita and Sarah,

Here is a photo of the sawtooth star block quilt I made for our grandson.

I used the method as described in your book Crazy Shortcut Quilts however I attached the sashing so that I could hand sew at the back . Thank you so much for the chapter 6 from your new book about quilted borders. I quilted the borders with wavy lines using my walking foot and then joined them to the quilt.

I was having some difficulty with sewing on the back sashing as described on page 105. Then I noticed that you were using a different Bernina foot (not the walking foot), so I changed to my 34D foot. A lot narrower than the walking foot and so much easier.

Thanks again for your help.

Kind regards.
Bonnie Jenkins
Salisbury, South Australia

Robbie's Quilt by Bonnie Jenkins

Robbie’s Quilt by Bonnie Jenkins

Filed Under: Finish Any Quilt, Meet ..., Quilt As You Go

Heather’s Modern Jelly Squares Quilt

September 15, 2016 by Marguerita

Heather used my book “Quilt As You Go {reimagined}” and resized her quilt to king size and sent me the pics and this note – I am just speechless!

Hi Marguerita

I just wanted to show you the king-sized quilt I made from your Quilt as You Go Reimagined Book. It has taken me 2 ½ years (on and off) to make and I am so proud of myself. I am a self taught quilter and gaining more confident with my sewing all the time. Hope you like it.

Regards,
Heather
Far North Queensland
Aust

bed

flat

Filed Under: Meet ..., Modern Quilt As You Go, Quilt As You Go, Quilts

Debbie C’s Special Quilt

September 5, 2016 by Marguerita

I met an Alaskan Quilter – Debbie lives in Anchorage and sent me a pic of her quilt and the most heartwarming message to go with it:

I make charity quilts mainly for a NICU, but occasionally I will get a request to do a special quilt for a family. I thought I was in over my head with a quilt I promised to a family going through a really tough time now in the process of trying to adopt a little boy. I was given a bag of his clothing, and asked to use the pieces in a quilt. I had no clue how I was going to do this and then I remembered I had purchased your book on shortcut quilts.

Oh my gosh! Now I must admit, it wasn’t easy, it required a couple of wine coolers?!! And at times I looked outside to see the beautiful weather, I live in Anchorage too, and thought to myself, ” why did I volunteer to do this!?”

But… I finished it this morning, your instructions were easy to follow and I am so pleased.

Thanks!

Debbie C

quilt

Filed Under: Meet ..., Quilt As You Go

Teresa Rush’s Finished Quilt

August 22, 2016 by Marguerita

Not only did she finish her quilt (here’s more about finishing any quilt), and beautifully, she sent the most gorgeous pictures too! Here’s Teresa’s story:

I hope the new year is finding you happy and healthy. I thought you might enjoy seeing what your book, “Finish (Almost) Any Quilt” has recently inspired. I have been playing around with free motion quilting and the techniques you so skillfully describe makes it possible to do on a my cherished 30 year old Bernina 930.

I sent a close up the free motion quilting I did on this border. It was the most intricate quilting I did.

The blocks in the middle was my first attempt at foundation paper piecing. Definitely helped with the scrap busting. LOL

Again thank you writing a book that is so easy to follow and allows me to make the quilts I want without having to wait until I can afford to pay someone else to quilt it on their long arm.

Teresa

Teresa's Gorgeous Quilt

Teresa’s Gorgeous Quilt

She added two quilted borders using QAYG.

She added two quilted borders using QAYG.

Teresa's Gorgeous Blocks

Teresa’s Gorgeous Blocks

Teresa's perfect machine quilting!

Teresa’s perfect machine quilting!

Filed Under: Finish Any Quilt, Meet ..., Quilt As You Go, Quilts

Caroline Pope’s Table & Quilt

August 12, 2016 by Marguerita

Another custom sewing table is created (read more here) and a quilt waiting to be finished. Here’s Caroline’s story:

Hi Marguerita,
I am a new machine quilter, this is my first machine quilt. I ambitiously went ahead and pieced together a full sized quilt, not even thinking about how to manage the quilt on my home machine once I got to the quilting part. Thank goodness for your YouTube videos. I know you made them years ago, but I was so happy to stumble upon them. My husband and I made the table yesterday, and already the smooth surface and extra work space is a dream on my practice squares. I can’t thank you enough for putting up those videos.

Sincerely,
Caroline Pope

Caroline's Custom Sewing Table

Caroline’s Custom Sewing Table

Caroline's First Quilt!

Caroline’s First Quilt!

Filed Under: comfort, Ergonomics, Meet ..., Quilting By Machine, quilting table, Quilts

June Copeck’s Table & Quilt

August 2, 2016 by Marguerita

June asked me a common question about my Sewing and Quilting Table adaptations and when I replied, she sent me pics of her table and her quilt (check out those gorgeous batiks!), along with her story:

Thanks so much for your information. This is what I did. My sons cut a hole in my sewing cabinet and
it will work for both my sewing machines. I thought about spending over $100 for a plexiglass cover
to fit the sewing machine. but I thought of you and you plastic idea, so this is what I came up with.
I cut it a little short on the right side but it works really well and I love it. Cost $5.99.

Below are a couple of pictures of cabinet and my quilt as you go quilt using Batiks. Just need to put
the binding on. I choose to not do a border since it is a lap throw.

Sewing-Machine-Table

June Copeck's Quilt-As-You Go Quilt

June Copeck’s Quilt-As-You Go Quilt

Thank you June for sharing your table and your gorgeous quilt!

Filed Under: comfort, Finish Any Quilt, Meet ..., Quilt As You Go, Quilts

Maria’s Penguin Quilt Story

January 23, 2015 by Marguerita

Check out this super fun quilt and the story behind it, which is well worth the read. By the end you’ll know Maria, her daughter and her quilting goals in addition to the saga of the Penguins Quilt.

Penguins

Our friendship started with an email – Maria had questions about the joining process. She bought our quilting e-books on her Nook and she needed just a bit of encouragement to clarify the quilted block joining process. I sent a few tips, but I replied about 24 hours after receiving her email because I’ve been traveling so much and not always able to reply right away. By the time she received my message she had already figured everything out!! A day later (one day!) she emailed again to say she was taking her new knowledge to a treasured project. Here’s her story:

Hiya Marguerita!

Girl I have watched every last one of your videos and love them all! I’m anxious to see what you and your daughter come out with next. I’ve also read all three books that I purchased on my Nook. Below are photos (yes I would be flattered if you posted my photos! ) of my daughter, Alexa’s (who is now 21 yrs old LOL!) applique penguin quilt.

When I finished it last night I asked her if she still wanted it and her reply was “Mom! I’ve waited years for this quilt! No one is getting it!”. I had to laugh! Like I told you in earlier emails, this quilt has been waiting to be finished for 11 years?!

Appliqueing the penguins gave me no problems when I first started this quilt. But after that it was nothing but a disaster in the making! I had originally put white sashing around the blocks and added 3 borders BUT when I went to sandwich it I found not only was the sashing wonky but so were all of my borders and it was extremely heavy. There was NO way to get this top smooth enough for me to even try to quilt it. Soooo it ended up in my UFO cabinet hidden for many years.

Every once in awhile Alexa would ask me when I would finish her quilt. I found excuse after excuse because I had NO clue as to how I would finish it. Then 3-4 days ago for some reason I went to YouTube and was just watching random quilting videos and that’s when I came across your QAYG videos. Let me tell you, I was blown away! I couldn’t get enough and after watching all of them I came up to my quilting room and cut the penguin applique blocks out of their sashing, cut backing and batting…spray basted them and had all 12 quilted within an hour and a half!

I did get stuck on how to add the sashing like you do but again like I told you I made a scrap block and had that major AHA moment!! From there I got busy and cut my strips and even cut border fabric, sandwiched the border fabric, quilted those and added them to the quilt.

There’s one thing I did different and you may or may not have tried this but it sure cut down on time and saved me from stressing too much (it was a FACE PALM moment! LOL). While adding the long strips of fabric to the rows of blocks (the back 1 1/4″ x width strips) to the first set of blocks I had a little trouble making sure it stayed straight. While putting the first strip on the wheels in my head started turning again and I remembered I had a bottle of temporary basting glue that came with a metal adapter and a very small hole. So after finding it, I decided to try it on my 2nd row of blocks and it saved me not only time but worry!! Once I had basted the back strip with the glue, mainly all I had to worry about was making sure the front 2″ strip was straight. I didn’t glue the top strip down but pinned just to make sure neither piece moved while I sewed them down.

There is no way I can Thank you enough for sharing your wonderful videos and books that have allowed me to complete a quilt that I thought would literally rot in my UFO cabinet!

My next project is going to be a king size quilt for myself and my husband using layer cakes and I can’t wait to get started because I plan to use decorative stitches which is something else I’ve never done and your QAYG technique to get it finished!! This was also my first time to sew a binding to the back of a quilt and machine sew it down to the front. Can I say I am in LOVE again? I do know that at all cost…I will probably never make a quilt the “traditional” way again.

We will be grandparents in August so you can imagine the baby quilts I will be making from now on lol! One last thing I’d like to share with you is in the 15 years that I’ve been quilting, I have never used my walking foot. For some reason it scared the life out of me. But now, I’m happy to say I do believe it’s become my favorite foot to use! There’s only two things that I will invest in very soon and that’s a 16 1/2″ square ruler and a 20 1/2″ square ruler or I may just invest in the 20 1/2″ square… do you prefer both? or would just the 20 1/2″ suffice? Ok I will quit rattling on for now! Again thank you thank you THANK YOU!

Sincerely and always a follower of your videos and books…. a fellow quilter and a friend!!

Maria

P.S. A couple of my favorite sayings: 1. I’m not perfect so don’t look to close and hard at my stitching. The imperfections in each quilt is what makes them unique in themselves! 2. If it can’t be made using QAYG then I probably won’t make it! 3. Love who you’re with, what you are doing and mainly life’s too short to stress over a wonky stitch! LOL
______________________________________________________________
Quilters, receiving Maria’s email was so rewarding! I was thinking the other day “I can’t believe people read the books I write” and now to know that what I’ve written has made such a big difference for Maria and her daughter that I’m just speechless, and endlessly grateful for her kindness in sharing the story of her quilt.

The quilt pattern that Maria adapted is called “Penguin Paradise” and is by Amy Bradley.

Thank you from the bottom of my heart to everyone who has sent me their quilting questions, stories and photos!
Signature-Image

Filed Under: Crazy Shortcut Quilts Book, Finish Any Quilt, Meet ..., Quilt As You Go, Quilts

  • Page 1
  • Page 2
  • Page 3
  • Go to Next Page »

Primary Sidebar

If you need help with anything in any of our books, please email me and I’ll do my very best to help you. ~Marguerita  MMQuilts @ gmail.com

Alaskan Novels

Check out Inside Alaska for action-adventure stories about life on the water and in the small towns of Alaska and for Women’s Fiction and Romance, set in Southcentral Alaska.

T-Shirt Quilts – My Most Popular Book!

T-Shirts into quilts with quilt-as-you-go!

Finish (almost) Any Quilt

Marguerita guides you through the steps of taking your unfinished projects and easily converting them to quilt as you go.

Modern Quilt As You Go

Modern twist to block making with an updated quilt-as-you-go process.

Crazy Shortcake Quilts with 10″ Squares

It's a Layer Cake Quilt!

Sew & Quilt in Comfort

How to inexpensively create and arrange your quilting space to fit you perfectly and make machine quilting SO much easier!

Categories

  • Accessories
  • Books
  • Classes
  • comfort
  • Commercial Fishing
  • Cooking
  • Crazy Shortcake Quilt
  • Crazy Shortcut Quilts Book
  • Decorative Stitches
  • Ergonomics
  • Face Mask
  • Finish Any Quilt
  • Good Causes
  • Good Gauses
  • Granddaughter Audrey
  • Just for Fun
  • Meet …
  • Modern Quilt As You Go
  • Nice things
  • Our Book
  • Patterns
  • Playing Pool
  • Quilt As You Go
  • Quilting By Machine
  • quilting table
  • Quilts
  • Quilts in the works
  • Rabbits
  • Reading and Writing
  • Sarah Raffuse
  • Sewing and Quilting Tips
  • sewing and quilting videos
  • T-Shirt Quilts
  • The Frugal Quilter
  • The old house
  • Travel Alaska and more
  • Uncategorized
  • Wearables

Privacy Policy

Crazy Shortcut Quilts Website Privacy Policy

Copyright © 2026 · Dynamik-Gen on Genesis Framework · WordPress · Log in