• Skip to primary navigation
  • Skip to main content
  • Skip to primary sidebar

Quilt As You Go, Simply Done

Simply Done

  • Home
  • Crazy Shortcut Quilts
  • Finish Any Quilt
  • Tee Shirt Quilts – Quilt As You Go
  • Modern Quilts
  • Crazy Shortcake
  • The Authors
  • Comfort
  • Marguerita’s Blog
  • Finished Quilts!
  • Our Quilt Videos
  • Favorite Tools
  • Newsletter

Marguerita

Dawn’s T-Shirt Quilt

May 28, 2021 by Marguerita

Just a note to thank you so much for your recent book!

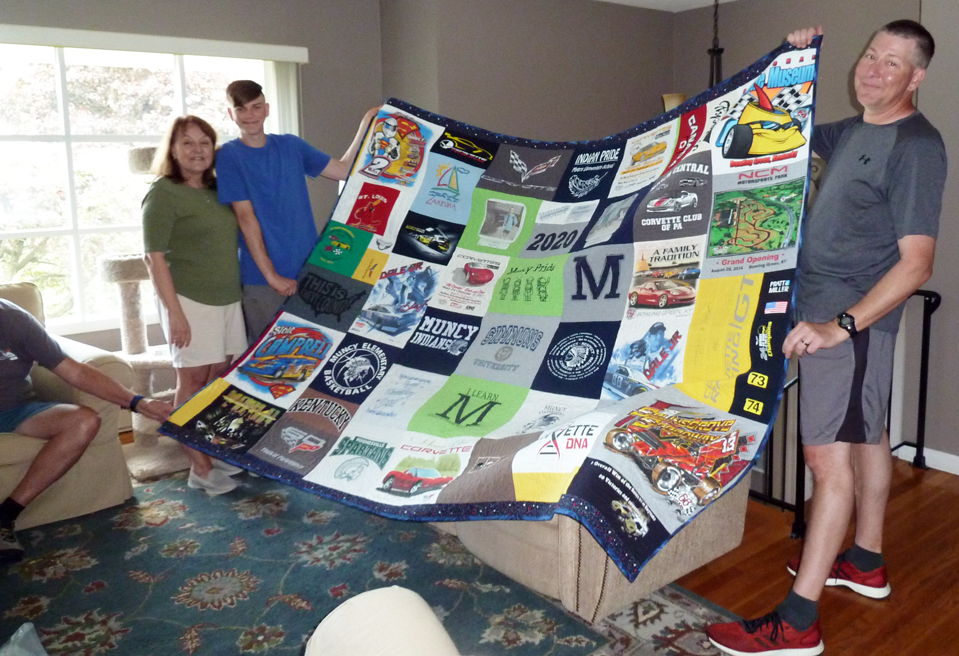
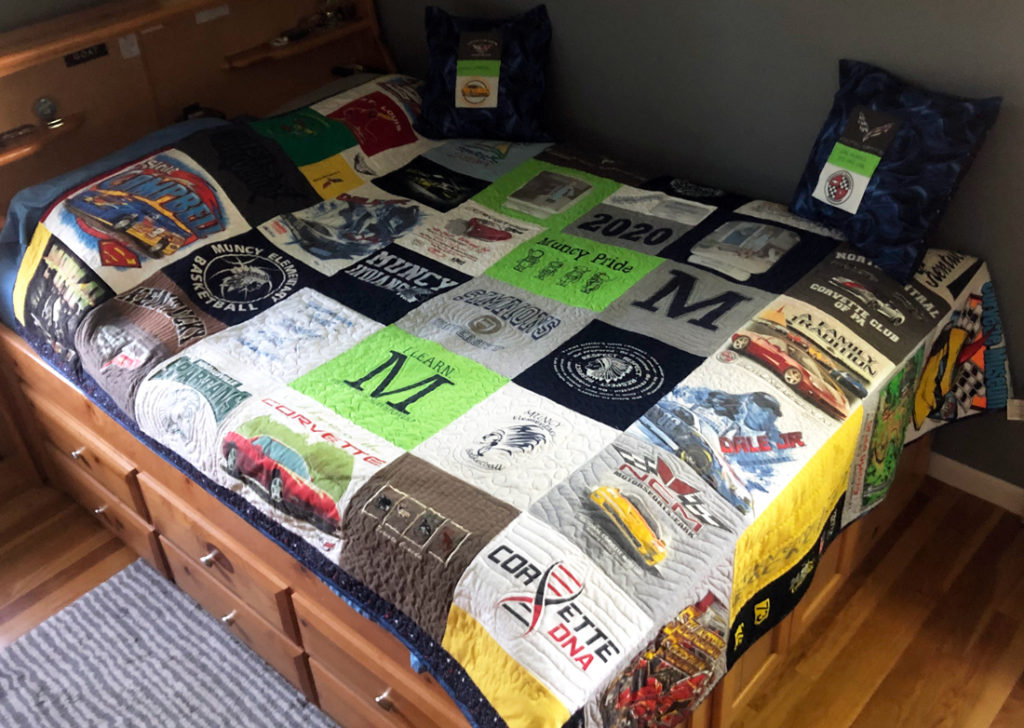
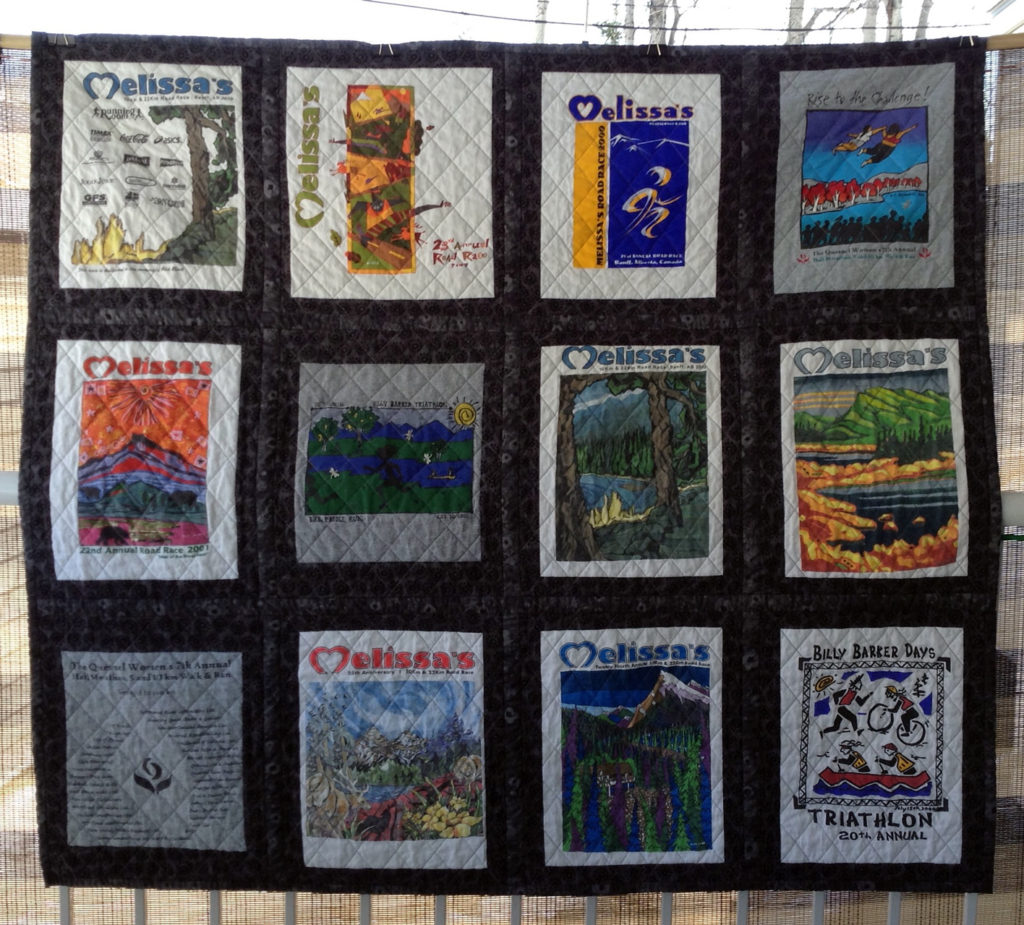
I have just finished my first T-shirt quilt using your book as my guide.  Your concise instructions and helpful hints made this a very enjoyable project.  I used flannel for the backing so it was heavy at the end to work with – but things worked out!

Thank you once again!
Dawn R

Filed Under: Quilt As You Go, Quilts, T-Shirt Quilts

Judy S’s T-Shirt Quilt

April 30, 2021 by Marguerita

Judy has sent me several pics of her T-Shirt Quilts. Here’s a graduation quilt and story!

Hello Marguerita,

I don’t think I sent you the picture of the finished quilt and also pillows too –for Shawn’s graduation.

So here it is on his bed and also when he first got it.

He was so pleased, they went to visit other grandparents and he came home, said he could not take it any longer and put it on his bed.

I had enough backing left to make two pillows with backing fabric and a couple more tee shirt blocks for them—and did the binding in that too.

He ended up having three graduations. He attended the Lycoming County Career and Tech Center and we were so pleased he was Student of the Year there. That was a drive up and get out get diploma/certificate.

He had to do a speech and because he was SOY. He was allow two more people and chose us.

We were the only Non-parents there – well for the seniors!

Then Muncy High School allowed 15 minutes with 15 people to attend and receive diploma during restrictions.

However the restrictions lifted and Shawn had a regular/short but as it should be done– Muncy High School Graduation.

We were so pleased for him. There are school around that only did the drive up and get diploma.

He’s off to Pennsylvania College of Technology to do the Honda Certified Mechanic two year Program with 100% placement.

It sure is a scary world we are living in at this time.

Be Safe, Blessings to all.

Your PA friend,

Judy

If you look closely you will see pictures.

P.S. I got the material you put thru the printer and printed picture of first day first grade and first day of Senior Year.  That was a big success, he loved them on his quilt.

Judy

This quilt isn’t done as quilt-as-you-go but Judy’s first ones were and we continue to stay in touch! Thank you Judy S!

Filed Under: Quilts

How to Fix an Ear Loop Mask

April 15, 2020 by Marguerita

Use ribbon, string, elastic, hairloop elastics, whatever you can to tie into earloops and secure them around your head, not your ears.

Two ponytail holder elastics, interlocked.

Two or more ponytail holders make an approximately 5″ loop, which is a good length for providing the right amount of tautness to hold a mask firmly to your face for extended periods of time and still allow enough stretch and space to safely remove your mask. Use safe practices when removing a used mask or you’ve wasted your time wearing it!

Use ribbon or string to tie the elastics to the ear loops of an earloop-style mask. Earloops can pop off and then put strain and pain on your ears. There’s always a way to make things better…

Filed Under: Face Mask Tagged With: Ear Loop, Elastic, Face Mask, Ribbon

Cover-up for N95 Mask

April 15, 2020 by Marguerita

I had to go grocery shopping and wanted a covering for my old N95 mask.

I have been wearing masks for years when I work on anything from insulating my cabin with fiberglass…

…to tearing down an old cabin filled with black mold. I am very used to using masks and I have several that I re-use. I attend professional training regularly on the proper use of PPE. One of my N95 masks is tan colored from the sand in Arizona, where the sand holds a fungi that can cause a condition called “Mohave Valley Fever”, a miserable respiratory infection that I don’t want.

But an N95 mask is rather a scary looking thing and I wanted some bling to cover it. So, I dumped out my shimmery fabrics, sorted them by color and found a nice band of bangles I’ve always wanted to use.

This mask is one thin layer of Lamé (Wiki on Lamé) with top and bottom hem, no nose-piece and rolled-hem channels on the sides for ribbon. Lamé fabric is so loosely woven that it would never make a good mask, but it sure makes a fun cover-up. The gold ‘coins’ are Wrights Twill with Coin Trim. I’m pretty sure I’ll be making more of these. This one started as 10″ wide by 8 and 1/4″ top-to-bottom but there was still some mask showing. I’ll cut the next one to 10″ x 9″ or maybe even 9 and a half inches.

Filed Under: Face Mask, Just for Fun Tagged With: Mask Cover, N95, PPE

Nose Piece for Face Masks

April 15, 2020 by Marguerita

Tom and I were sharing mask ideas when he came up with the idea of a paperclip nose piece for masks and it’s genius. The nose piece is important because the goal of the mask is to be snug to your face.

We have been training with PPE for almost 20 years and we understand its importance and how to properly don and remove it.

A normal paperclip makes a great nose piece for masks when the ends are curled inward.

To make, straighten a regular (not jumbo) paperclip and use a needle-nose pliers to turn the ends under. Slip the straightened metal into the hem of a cloth face mask and center, then form the curve with your thumbs. Try the mask on to see how it fits and continue to bend the metal until the fit is snug against the bridge of your nose.

Filed Under: Face Mask Tagged With: Nose Piece, Paperclip

Batik Fabric Face Mask

April 12, 2020 by Marguerita

This test is with two layers of batik, testing ribbons and elastic. I like a thicker (3/8″) ribbon over the thinner (1/4″) and I much prefer the sewn channel along the side versus leaving it open, which is what I tried at first.

This is a double layer of batik fabric that was very comfortable to wear. It has the “pocket opening” at the top and the molded nose-piece.

Thin blue ribbon on left bunched up while the thicker one gathered evenly.

I also prefer sewing the ribbon ends versus tying them and I really like this wider piece of elastic (1″ wide) I found in one of my sewing bins. It slid comfortably on and off and held the mask in place very well. I cut 7″ and sewed the ends closed, leaving enough room to thread the ribbon, attached to a safety pin, through.

1″ of elastic with ends folded over 1/2″ and stitched.

Here’s my tutorial for a Home Use Fabric Mask – https://www.crazyshortcutquilts.com/diy-face-mask-with-ribbon/

Filed Under: Face Mask Tagged With: Batik Face Mask, Elastic, Fat Quarter Face Mask

Face Masks for Michelle

April 10, 2020 by Marguerita

I made two masks for a friend who doesn’t have a sewing machine or any materials to make one with. She chose the fabrics from an image I sent her in chat.

I learned as I went and discovered that the grosgrain ribbon is a bit stiff and if only knotted, comes undone in either the washing machine or the dryer.

After hunting all the parts down I put the ribbon back through the mask and then sewed it to itself after threading through the elastics.

Because I used a combination of batik fabric and well starched t-shirt, there was no shrinkage in the wash. The nose piece held up well also. I’m happy with this design and will continue to use it with either ponytail elastics or elastic cording, when I can buy some.

Here’s my tutorial for a Home Use Fabric Mask –

DIY Fabric Face Mask with Ribbon and Nose Piece

Filed Under: Face Mask Tagged With: Batik Face Mask, Elastic, Face Mask, Ribbon, T-Shirt Face Mask

Experienced Mask Wearer

April 8, 2020 by Marguerita

Tom and I train annually for how to respond to the next oil spill in Alaska. Part of that training is how to wear – meaning put on, use carefully and safely remove – protective outerwear. We suit up, glove up, mask up and have chocolate syrup poured over us, then have to take it off without contaminating ourselves.

It’s not easy.

Protecting yourself against something you can’t even see is tremendously more difficult.

That’s why I designed the best possible homemade Home Use mask I could and I want people to understand it.

Outer fabric is tight weave quilting cotton or batik. The pocket is for additional filtration, like a section of blue shop towel. Inner layer is something soft against your face.

EASY ON OFF IS CRITICAL FOR NON-CONTAMINATION. Yes, I am shouting that. All the masks in the world won’t protect you if you take it off wrong and contaminate yourself. Go ahead, try it with syrup – any kind – on your mask. Learn how to do it right.

Here’s my tutorial on how to make the mask for Home Use and below that how to take it off properly – https://www.crazyshortcutquilts.com/diy-face-mask-with-ribbon/

Filed Under: Face Mask Tagged With: Face Mask, PPE, Remove Face Mask

Rotary Cutting Fabric – The Right Way

May 7, 2019 by Marguerita

Hi Quilters, if you struggle putting your traditional quilt blocks together and having seams match (not our crazy cutting methods) I may have the tip you need: it all starts with cutting and I’ve made a video about it – posted below.

I have seen two big mistakes that quilters make – new and experienced quilters – and they are at the most basic level of quiltmaking: cutting and pressing.

This topic is about rotary cutting fabric accurately so that your quilt pieces are all the same size and they come together easily and perfectly. The trick is using your ruler and cutting mat the right way.

The lines on any cutting mat, and on poorly made rulers, are not accurate enough for precise cutting. Lately wherever I go – guilds, quilting with friends, or even watching videos – I see quilters using their mat as a guide for cutting, which is a huge mistake.

The markings on a well made ruler are the best guide for cutting.

Here’s an example from a recent quilt I made where I needed 36″ long strips of different widths.

To cut the strips, first I trimmed off the selvage edge, on the left, aligning the markings of the ruler with the fabric fold. I didn’t use any of the lines on the mat at all to do this. Then, to make all the strips the same length, I trimmed off the bottom (raw) edge by putting the ruler on the fabric at the length I wanted: 36″. Since the fabric is folded in half I used the 18″ mark on the ruler.

The ruler is aligned to the fold of fabric on the 18″ line to give me 36″ long strips.
The only marking that matters here is the 18″ line on the ruler, aligned with the fold.

Now that the length is cut I can adjust the ruler down one inch to give me plenty of room for making my cuts. I aligned the ruler with the 19″ mark on the fold and aligned the long edge of the fabric with the 2.5″ mark on the ruler to make my first cut.

The left edge is straight, length is exact, now I can cut my strips to the desired widths, using the markings on the ruler, not the mat.

I continue to move the ruler to the right, on top of the fabric, cutting the width of strips needed for my project: 5 strips @ 2.5″ wide, 4 strips @2″ wide and 4 strips at 1.25″ wide. As I moved the ruler I continued to measure and cut the length of the strips using the 18″ mark along the fold of the fabric.

This method is fast and extremely accurate and once you try it, very easy.

Here’s the real test – put your ruler on your mat and look at the markings on both. You may be in for quite a surprise!

Here’s the video I made about cutting fabric using your ruler, not the mat.

Let me know what you think! My next project will be a demo on pressing – the second most common mistake I see quilters make.

I hope this helps you. Wishing you happy quilting, Marguerita

Filed Under: Sewing and Quilting Tips

Edith’s Custom Quilting Table

June 24, 2018 by Marguerita

Edith sent me a long note and several pics of her table – she’s thrilled! Here’s what she shared:

I wanted to send you a thank you note. Recently I was all ready to buy a very expensive sewing table – it was 30% off, but still more than I wanted to pay!! Like $1600!!! Fortunately for me, they asked me to measure the width of my door before they delivered, and we discovered that it wouldn’t fit. Solution to that problem of lost money LOL.

I was on YouTube looking for videos about how to put together the three layers of my quilt without getting on the floor, and came across your video for making a “cheap” quilting table. Hallelujah. In three days I had bought the insulation and cut it to size, Had put my quilt together (and not on the floor!) and was sewing it on this fabulous set up. $40 for the insulation and I already had the table. Fortunately I have a drop in bobbin on my machine so I didn’t have to cut out the insulation for that. I really needed 3 1/2 inches thickness and I used to pieces of the two inch just because it’s what I had, so I trimmed it down around the free arm and it’s working pretty well.

For the first time I am sewing without a sore back, without sore shoulders, without tired arms! I’ve used several of your videos and saw what you showed about the ergonomics and it’s made a world of difference. Sometimes though I loved sewing and I love the finished products, I don’t love the almost torture to my back. This has solved that!!! Bonus!!

Put me on your list of testimonials! I am very happy I came across your YouTube videos. I will attach pictures. And by the way the quilt is being made for my six-year-old grandson from shirts of his dad, his granddads, and even one of his great grandfathers. It’s not perfect and I really don’t care about that LOL. It’s as good as anything I’ve ever done and I’m enjoying making it!!

You’ve really been a big help! Thank you so much and keep up the good work. I will continue to follow you for ideas!

Edith
Manchaca, Texas

Filed Under: comfort, Ergonomics, quilting table

  • « Go to Previous Page
  • Page 1
  • Page 2
  • Page 3
  • Page 4
  • Interim pages omitted …
  • Page 33
  • Go to Next Page »

Primary Sidebar

If you need help with anything in any of our books, please email me and I’ll do my very best to help you. ~Marguerita  MMQuilts @ gmail.com

Alaskan Novels

Check out Inside Alaska for action-adventure stories about life on the water and in the small towns of Alaska and for Women’s Fiction and Romance, set in Southcentral Alaska.

T-Shirt Quilts – My Most Popular Book!

T-Shirts into quilts with quilt-as-you-go!

Finish (almost) Any Quilt

Marguerita guides you through the steps of taking your unfinished projects and easily converting them to quilt as you go.

Modern Quilt As You Go

Modern twist to block making with an updated quilt-as-you-go process.

Crazy Shortcake Quilts with 10″ Squares

It's a Layer Cake Quilt!

Sew & Quilt in Comfort

How to inexpensively create and arrange your quilting space to fit you perfectly and make machine quilting SO much easier!

Categories

  • Accessories
  • Books
  • Classes
  • comfort
  • Commercial Fishing
  • Cooking
  • Crazy Shortcake Quilt
  • Crazy Shortcut Quilts Book
  • Decorative Stitches
  • Ergonomics
  • Face Mask
  • Finish Any Quilt
  • Good Causes
  • Good Gauses
  • Granddaughter Audrey
  • Just for Fun
  • Meet …
  • Modern Quilt As You Go
  • Nice things
  • Our Book
  • Patterns
  • Playing Pool
  • Quilt As You Go
  • Quilting By Machine
  • quilting table
  • Quilts
  • Quilts in the works
  • Rabbits
  • Reading and Writing
  • Sarah Raffuse
  • Sewing and Quilting Tips
  • sewing and quilting videos
  • T-Shirt Quilts
  • The Frugal Quilter
  • The old house
  • Travel Alaska and more
  • Uncategorized
  • Wearables

Privacy Policy

Crazy Shortcut Quilts Website Privacy Policy

Copyright © 2026 · Dynamik-Gen on Genesis Framework · WordPress · Log in