Hi Quilters, if you struggle putting your traditional quilt blocks together and having seams match (not our crazy cutting methods) I may have the tip you need: it all starts with cutting and I’ve made a video about it – posted below.
I have seen two big mistakes that quilters make – new and experienced quilters – and they are at the most basic level of quiltmaking: cutting and pressing.
This topic is about rotary cutting fabric accurately so that your quilt pieces are all the same size and they come together easily and perfectly. The trick is using your ruler and cutting mat the right way.
The lines on any cutting mat, and on poorly made rulers, are not accurate enough for precise cutting. Lately wherever I go – guilds, quilting with friends, or even watching videos – I see quilters using their mat as a guide for cutting, which is a huge mistake.
The markings on a well made ruler are the best guide for cutting.
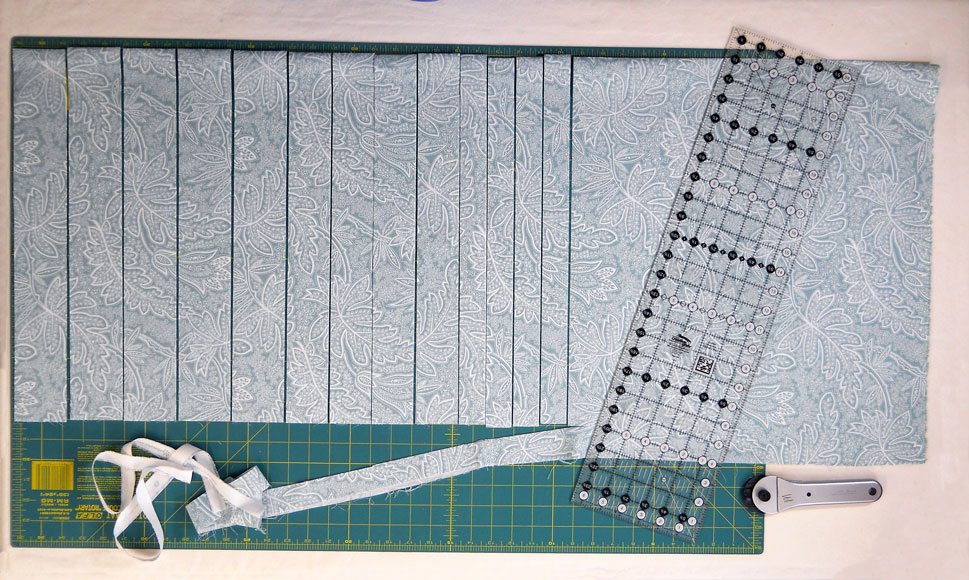
Here’s an example from a recent quilt I made where I needed 36″ long strips of different widths.
To cut the strips, first I trimmed off the selvage edge, on the left, aligning the markings of the ruler with the fabric fold. I didn’t use any of the lines on the mat at all to do this. Then, to make all the strips the same length, I trimmed off the bottom (raw) edge by putting the ruler on the fabric at the length I wanted: 36″. Since the fabric is folded in half I used the 18″ mark on the ruler.
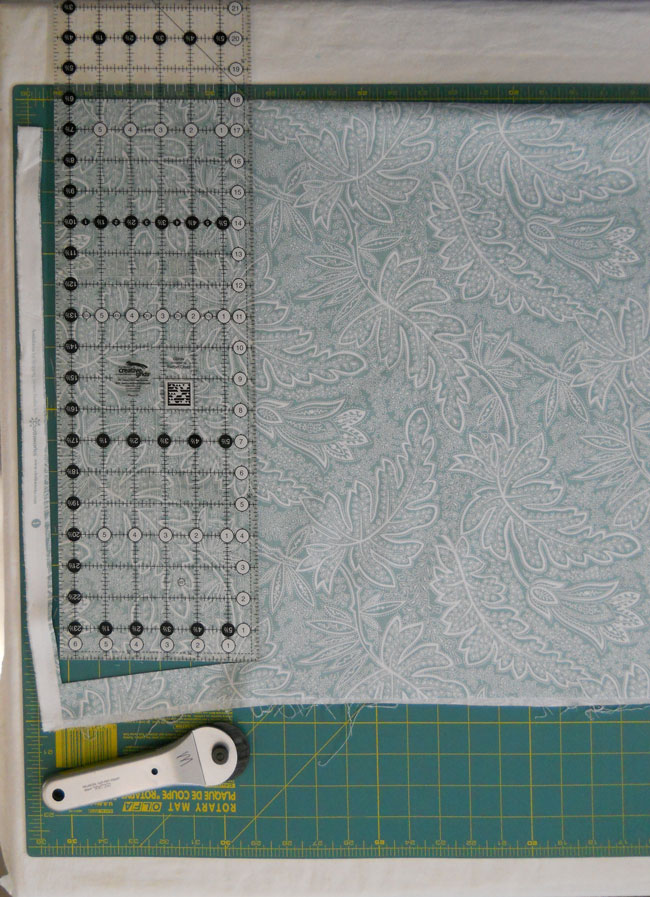
Now that the length is cut I can adjust the ruler down one inch to give me plenty of room for making my cuts. I aligned the ruler with the 19″ mark on the fold and aligned the long edge of the fabric with the 2.5″ mark on the ruler to make my first cut.
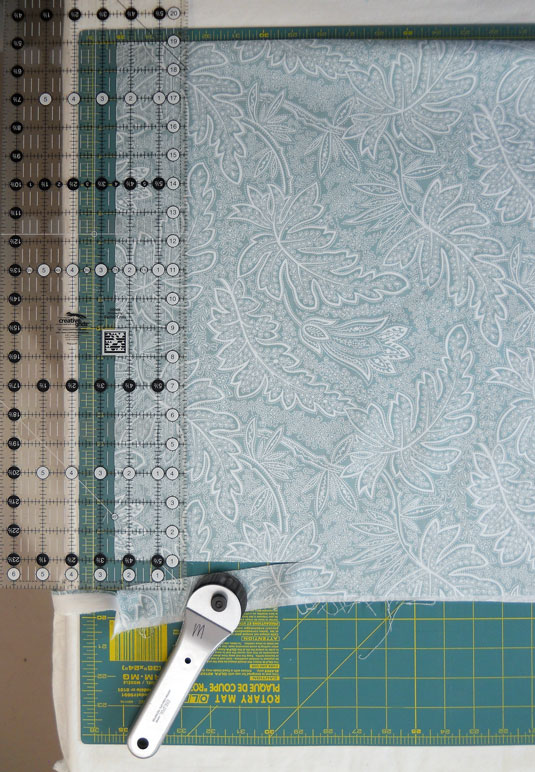
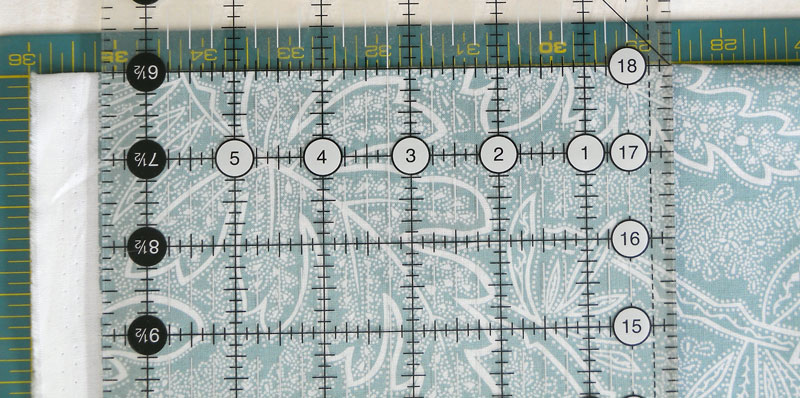
I continue to move the ruler to the right, on top of the fabric, cutting the width of strips needed for my project: 5 strips @ 2.5″ wide, 4 strips @2″ wide and 4 strips at 1.25″ wide. As I moved the ruler I continued to measure and cut the length of the strips using the 18″ mark along the fold of the fabric.
This method is fast and extremely accurate and once you try it, very easy.
Here’s the real test – put your ruler on your mat and look at the markings on both. You may be in for quite a surprise!
Here’s the video I made about cutting fabric using your ruler, not the mat.
Let me know what you think! My next project will be a demo on pressing – the second most common mistake I see quilters make.
I hope this helps you. Wishing you happy quilting, Marguerita
